When you’re starting yoga, whether for the first time or coming back to it, looking at yoga class offerings can be rather confusing. With a plethora of options such as hot yoga, hatha yoga, Vinyasa flow, Kundalini, or Iynegar, you may wonder which class is right for you. To clarify, there are a finite number of yoga poses. All yoga classes have yoga poses or asanas in some form. For example, Downward-Facing Dog is a pose you will practice in a hot yoga class, a Vinyasa flow class, or a hatha class.
The approach to yoga and the focus are what differ in each style of yoga. Some styles are focused more on breathing (pranayama), others on weight loss, and some on meditation. One style in particular, yin yoga, differs from most class offerings today in that the purpose is to harness a more passive energy.
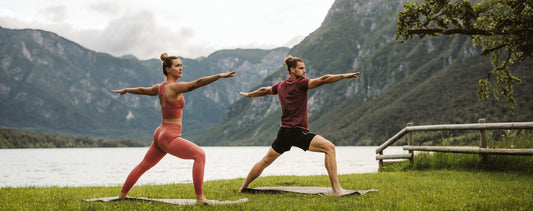
Most yoga practices are yang. They are designed to challenge your body by heating it up and getting your bodily systems moving to increase respiration, improve circulation, and move toxins out. Even in slower moving yoga classes, you will feel your body heat up because you are generating that heat from within, while holding a pose, such as Warrior or Plank.
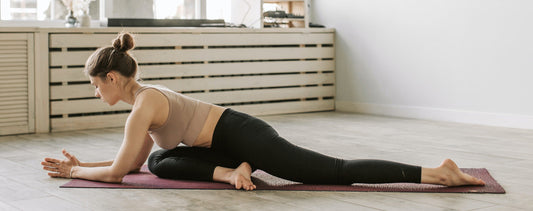
Yin yoga is designed to do the opposite. The goal of yin is to cool the body, nurture it, and gently coax it into asanas. There is nothing forceful about yin yoga. It allows your body to relax. Through passive movement, your connective tissue, such as ligaments, joints, and fascia, will lengthen and strengthen. Restorative yoga classes tend to use yin yoga poses because of the relaxing effect on the body and mind.
If that sounds like a really long time, it is and it isn’t. You will have plenty of yoga props available to you to assist you in holding a pose for that long. A great yin teacher will show you how to use bolsters, blankets, blocks, and straps to assist you in your yin poses. Even if you’ve been practicing yoga for a long time, try using the yoga props. You have no idea how your body will feel about holding a pose for five minutes and you want to embrace the yin practice of allowing versus forcing your body to hold the pose.
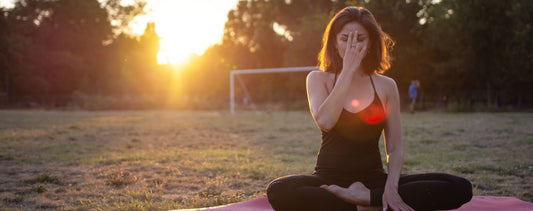
Because you’re holding poses for a long time and focusing on your breath, the practice becomes meditative in nature. Once you allow your body to relax and let gravity and your breath do the work, you enter a meditative state and even five minutes seems like a short amount of time.
Yin yoga has a set number of poses, most of which are done in every class. You will experience many hip openers and almost no standing poses. Examples of yin yoga poses are:
yoga-sleeping-swan.jpg
This is a relaxing way to gently open up your hips. Make sure to have your rolled-up towel or bolster and yoga block on your mat.
yoga-legs-up-the-wall.jpg This pose is great for circulation and to counter the effects of varicose and spider veins. Make sure to bring a rolled-up towel or bolster to your mat, and then slide your mat to an open wall space so that it’s perpendicular to the wall.
yoga-deer-pose.jpg This is another great gentle pose to open your hips. You will need a yoga blanket or a towel folded in half and a yoga block for this pose.
Allow some moments of uninterrupted time to explore inner calm and expanded awareness at our signature meditation and yoga retreat, Seduction of Spirit. Learn More.
The approach to yoga and the focus are what differ in each style of yoga. Some styles are focused more on breathing (pranayama), others on weight loss, and some on meditation. One style in particular, yin yoga, differs from most class offerings today in that the purpose is to harness a more passive energy.
The Difference Between Yin and Yang
Yin and yang are polar opposites in energy. Yin energy is passive, lunar, cooling, and feminine. Yang energy is forceful, solar, heating, and masculine. The two energies work together in concert within the universe and within your body.Most yoga practices are yang. They are designed to challenge your body by heating it up and getting your bodily systems moving to increase respiration, improve circulation, and move toxins out. Even in slower moving yoga classes, you will feel your body heat up because you are generating that heat from within, while holding a pose, such as Warrior or Plank.
Yin yoga is designed to do the opposite. The goal of yin is to cool the body, nurture it, and gently coax it into asanas. There is nothing forceful about yin yoga. It allows your body to relax. Through passive movement, your connective tissue, such as ligaments, joints, and fascia, will lengthen and strengthen. Restorative yoga classes tend to use yin yoga poses because of the relaxing effect on the body and mind.
Yin Yoga Class Format
In a good yin yoga class, the class length will be anywhere from 75 to 90 minutes or more. Yin yoga poses are held much longer than in other classes. You will hold most poses for three to five minutes each.If that sounds like a really long time, it is and it isn’t. You will have plenty of yoga props available to you to assist you in holding a pose for that long. A great yin teacher will show you how to use bolsters, blankets, blocks, and straps to assist you in your yin poses. Even if you’ve been practicing yoga for a long time, try using the yoga props. You have no idea how your body will feel about holding a pose for five minutes and you want to embrace the yin practice of allowing versus forcing your body to hold the pose.
Because you’re holding poses for a long time and focusing on your breath, the practice becomes meditative in nature. Once you allow your body to relax and let gravity and your breath do the work, you enter a meditative state and even five minutes seems like a short amount of time.
Yin yoga has a set number of poses, most of which are done in every class. You will experience many hip openers and almost no standing poses. Examples of yin yoga poses are:
- Butterfly Pose (Badhakonasana)
- Child’s Pose (Balasana)
- Shoelace Pose
- Caterpillar Pose (Salabasana)
- Pigeon Pose (Kapotasana) and Sleeping Swan Pose
- Deer Pose
- Spinx Pose (Salamba Bhujangasana) and Seal Pose (Bhujangasana)
- Lizard Pose (Utthan Pristhasana)
Who Can Benefit from a Yin Yoga Class?
Those who are recovering from an injury or surgery, or dealing with chronic illness, can benefit from yin yoga. Yin yoga has also been used for people healing from addictions or for treating anxiety and depression. Yin yoga helps to counter the effects of a frenetic and chaotic lifestyle and can also help with fertility problems.Yin Yoga Poses to Try at Home
Here are a few yin yoga poses to try at home. In your yoga space, gather the following items:- A rolled-up towel or yoga bolster
- A pillow
- A yoga block or a solid object about four inches high
- A timer
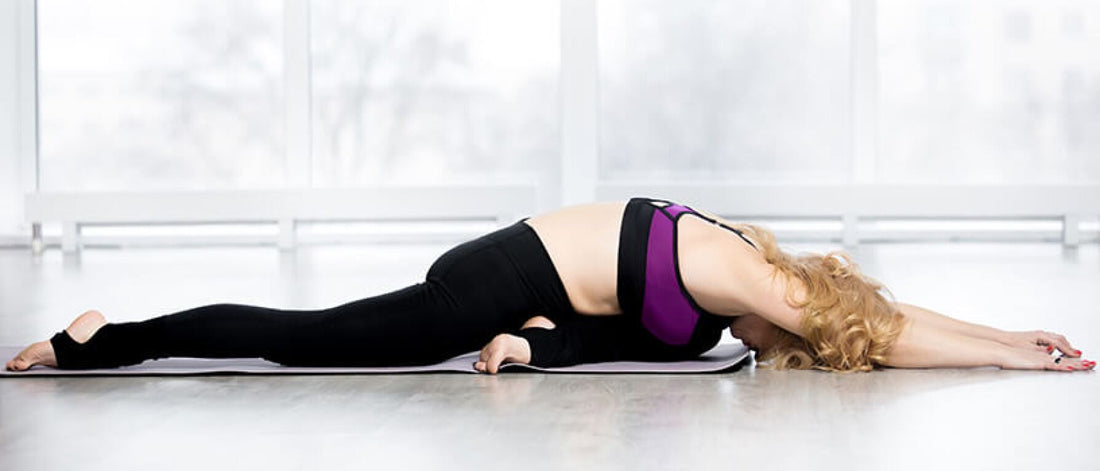
1. Sleeping Swan Pose
This is a relaxing way to gently open up your hips. Make sure to have your rolled-up towel or bolster and yoga block on your mat.
- Start in an all fours position.
- Gently side your right knee forward and bring your right heel slightly in front of you. Elongate your left leg directly behind you and relax your toes.
- Come down to your elbows and forearms so you look like a sphinx. If your hips are tight, place a bolster underneath your right hip. If the sensation is too intense, place the yoga block under your elbows to bring you off the floor a little. Make sure your weight is evenly distributed between the right and left sides. Try not to lean the hips but keep them centered.
- To take the pose further, slide your arms forward and rest your forehead on the mat.
- Hold the pose for five minutes then switch sides.
2. Legs Up on the Wall Pose
- Start with your knees bent and sit sideways so your left hip and left shoulder are touching the wall.
- Slide your legs up the wall as you lean to the right and lie on your back.
- Bend your knees a little and press your feet to the wall to lift your hips off the floor.
- Slide the bolster underneath the sacrum or lower back right above the tailbone. Your buttocks will be about two to three inches away from the wall and your legs will rest on the wall.
- Bring your arms to the sides slightly below the shoulders to open the chest.
- Close your eyes and rest in the pose for five minutes.
3. Deer Pose
- Begin by sitting in Butterfly Pose with your feet touching at the center and your knees wide open.
- Slide your right foot forward until your lower leg is at a 90-degree angle.
- Release the left leg and flip it around so your left foot is behind you. Move the left leg to a 90-degree angle behind you. Both legs will be in a letter “L” shape—one in front and one in back. At this point, you may need to place your blanket under your bottom to alleviate lower back pain.
- Sitting tall, place your left hand on your right thigh and your right hand behind your tailbone on the floor. If your right hand doesn’t reach the floor, place a yoga block underneath it.
- Open your right shoulder and turn your head to look over your right side. Lift tall through the spine and breathe deeply into the lower belly.
- Hold the pose for three minutes and switch sides.
Allow some moments of uninterrupted time to explore inner calm and expanded awareness at our signature meditation and yoga retreat, Seduction of Spirit. Learn More.